With these 10 basic embroidery stitches you can stitch outlines, lettering, flowers and filled shapes. Learn them all on a $12–$15 practice sampler.
You only need a handful of stitches to embroider almost anything. These 10 basic embroidery stitches cover outlines, lettering, flowers, leaves and filled shapes, and every one of them can be learned in an evening on a scrap of fabric. Start with the first three, then add the rest as your projects need them.
Total cost to practice all 10 stitches: about $12–$15. A 6-inch wooden or plastic hoop (about $2–$4), a fat quarter of cotton or linen fabric (about $3–$5), a small pack of embroidery needles (about $2–$3) and 4–6 skeins of six-strand cotton floss (about $0.50–$1 each).
Before you start
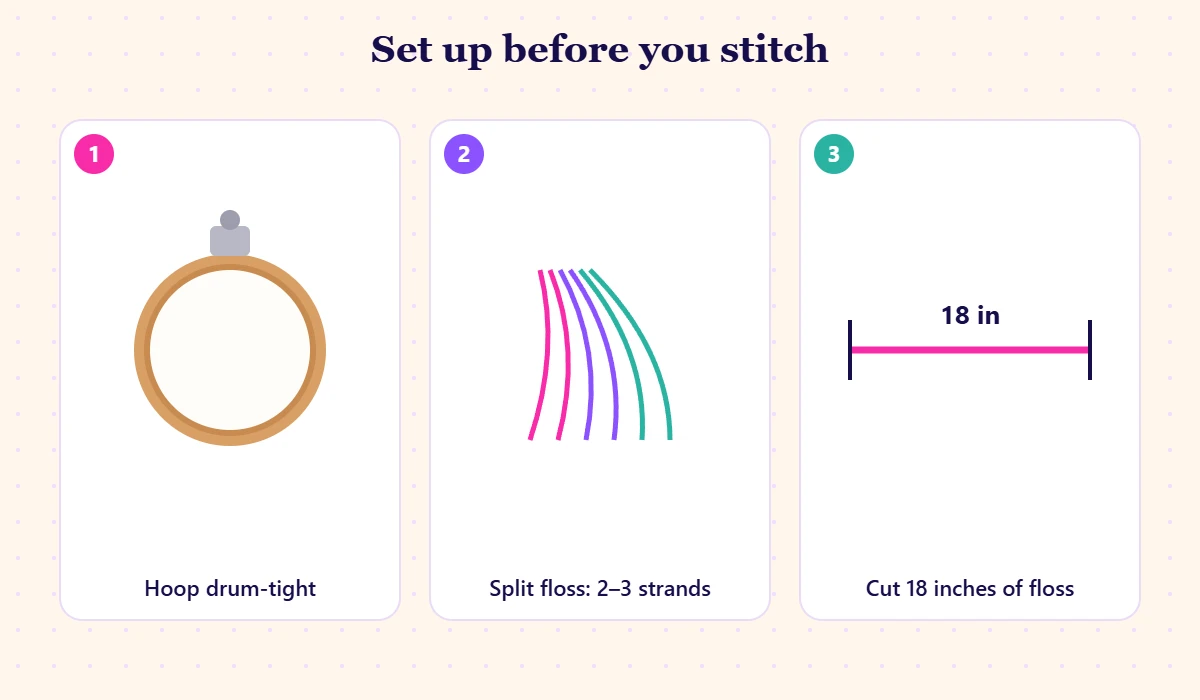
- Hoop the fabric drum-tight. Loose fabric puckers. Tighten the screw and tug the edges until the fabric sounds like a drum when you tap it.
- Separate your floss. Embroidery floss has six strands. For most of these stitches, use two or three strands. Pull one strand out at a time and put them back together, so the floss doesn't tangle.
- Cut an arm's length of floss, about 18 inches. Longer pieces knot and fray.
- Draw a guide. Sketch lines and simple shapes with a water-soluble pen or a pencil so you have something to follow.
Outline stitches
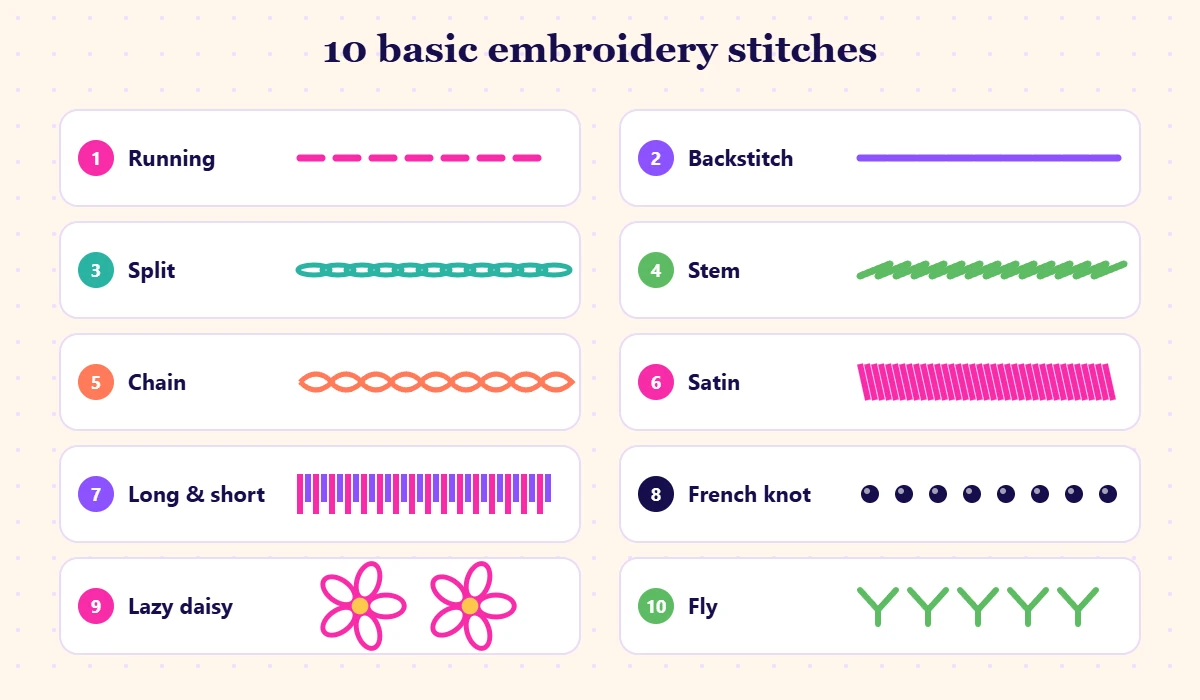
1. Running stitch
The simplest stitch: bring the needle up, go down a short distance away, come up again a short gap ahead, and repeat. Keep stitches and gaps the same length. Great for dashed lines, borders and quilting-style details.
2. Backstitch
The workhorse for outlines and lettering. Come up one stitch length ahead of where you want the line to start, go down at the start point, then come up one stitch length ahead of the last stitch and go back down into the end of the previous stitch. The result is a solid, even line.
3. Split stitch
Make a stitch, then come up through the middle of it, splitting the floss, and go down one stitch length ahead. It creates a textured line that looks like a tiny chain and works well on curves. Use an even number of strands so it's easy to split.
4. Stem stitch
Perfect for flower stems and smooth curves. Work from left to right, keeping the floss below the needle. Each new stitch comes up halfway along the previous one, so the stitches overlap into a twisted, rope-like line.
5. Chain stitch
Come up, go back down into the same hole and leave a small loop. Come up inside the loop a short distance ahead and pull to snug it down. Repeat to build a chain. It's bold, decorative and great for lettering.
Fill stitches
6. Satin stitch
Straight stitches laid side by side to fill a shape completely. Outline the shape first with split stitch for a crisp, slightly raised edge, then cover it with stitches that go all the way across. Keep stitches parallel and close together, and avoid very long stitches, which snag.
7. Long and short stitch
Used for shading, like on petals. Work a first row of alternating long and short stitches along the edge, then fill in with rows of similar-length stitches that blend into the gaps. Change floss color between rows for a smooth gradient.
Detail stitches
8. French knot
Bring the needle up, wrap the floss around the needle two times, then put the needle back down right next to where it came up, holding the wraps snug with your other hand as you pull through. Use it for flower centers, eyes and dots. If your knots pull through to the back, you went down in the exact same hole; move over a thread.
9. Lazy daisy
A single detached chain stitch. Come up, go back down in the same spot to form a loop, come up at the tip of the petal inside the loop and make a tiny stitch over it to hold it down. Arrange five in a circle for a quick flower, or use one as a leaf.
10. Fly stitch
A V-shaped stitch tacked in the middle. Come up at the top left, go down at the top right but leave the floss loose, come up in the center below and tack the loop down. Stack them for leaves, ferns and branches.
Which stitches to learn first
| Goal | Use these stitches |
|---|---|
| Words and lettering | Backstitch, split stitch, chain stitch |
| Flowers | Lazy daisy, French knot, satin stitch |
| Stems and vines | Stem stitch, backstitch |
| Leaves | Fly stitch, satin stitch, lazy daisy |
| Filled shapes | Satin stitch, long and short stitch |
Practice project: a stitch sampler
Draw ten short lines or small shapes on your fabric and work one stitch in each. Label them with a backstitch. You'll have a reference you can look at whenever a pattern names a stitch you've forgotten, and you can frame it right in the hoop.
Want more? Find beginner-friendly patterns and techniques in Hand Embroidery, or try a different kind of stitching in our needlepoint guide for beginners.
FAQ
How many strands of embroidery floss should I use?
Two strands give fine, delicate lines; three strands are the all-round default; four to six strands make bold lines and quick fills. Use fewer strands for small details.
What's the difference between backstitch and split stitch?
Backstitch makes a smooth, flat line of separate stitches. Split stitch pierces the previous stitch, creating a slightly textured, braided-looking line that's better for curves and edges under satin stitch.
Why does my embroidery fabric pucker?
Usually because the fabric isn't tight in the hoop or because you're pulling stitches too hard. Re-tighten the hoop and let each stitch lie flat without tugging.
Do I need to knot my thread?
A small knot is fine for beginners. For a neater back, start with a waste knot a few inches away and trim it once you've stitched over the tail.